Blog

  • Do’s and Don’ts for Party-Ready Glam Makeup

    Getting ready for a party isn’t just about dressing well—your makeup plays a major role in defining the look. But achieving that glamorous finish without going overboard requires the right balance. Understanding what works and what to avoid can help you create a flawless party-ready appearance with confidence.

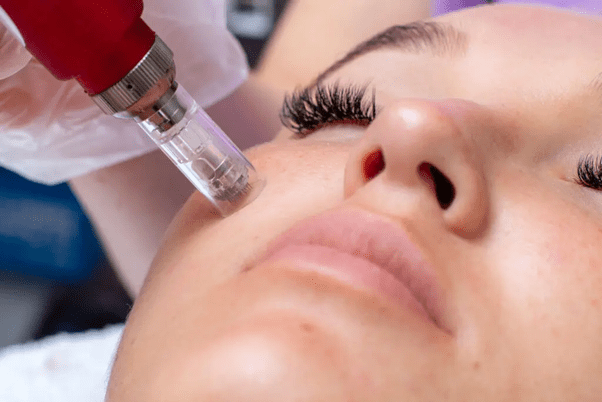
    To start with, prepping the skin is essential before applying any glam makeup. Clean and moisturized skin helps your base go on smoothly and stay fresh throughout the event. Skipping primer is one of the biggest mistakes people make before doing heavy or long-lasting makeup.

    A suitable primer minimizes pores, controls oil or dryness, and holds the makeup in place, especially if you’ll be under lights or dancing.

    When it comes to the base, full coverage doesn’t always mean flawless. Applying too much foundation can make the face look cakey or mask-like. Instead, the focus should be on blending well and matching the foundation to your exact skin tone. Concealer should only be used where needed—under the eyes, around the nose, or over blemishes—rather than layered all over the face.

    Eye makeup tends to be the highlight of a party look, but choosing one focal point is important. If you’re going for bold, smoky, or glittery eyes, it’s better to keep the lips neutral to create balance. On the other hand, a statement lip looks best when paired with soft or minimal eye makeup. This prevents the overall look from appearing loud or overdone. Always blend your eye shadow properly to avoid harsh lines, and test glitter or shimmer products beforehand to ensure they don’t cause irritation or fall out.

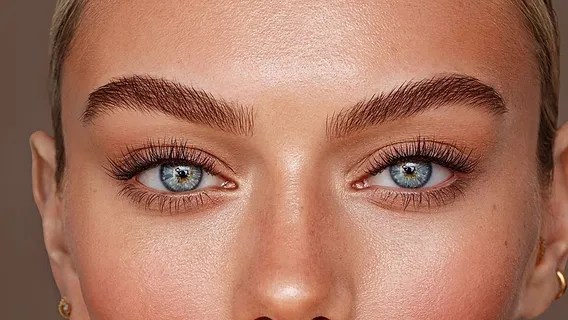
    Another common issue is ignoring the eyebrows. Overdrawing them can appear harsh, while leaving them completely untouched can make the face look incomplete. Lightly filling and shaping them according to your natural arch enhances the glam factor without making them look artificial.

    Blush, contour, and highlighter should enhance your facial features, not overpower them. Harsh contour lines or excessive highlighter can ruin even a well-done base. Applying products in soft strokes and blending upward gives a natural lifted effect. A subtle glow on the high points of the face—cheekbones, nose bridge, and brow bone—adds that perfect party-ready illumination.

    For lips, prepping is just as important as choosing the color. Applying lipstick on dry or chapped lips makes even the most expensive shades look patchy. Using a lip balm or scrub beforehand and lining the lips helps define the shape and keeps the color from bleeding.

    Finally, setting the makeup properly ensures it lasts through the event. Many people skip setting spray or powder, leading to creasing, oiliness, or smudging. A finishing spray helps the makeup settle and survive sweat, humidity, and long hours.

    In short, party glam is all about balance, skin prep, and smart product use. Avoiding heavy layers, mismatched shades, and harsh lines while focusing on blending, highlighting features, and creating contrast can completely transform your look. With the right techniques and attention to detail, your makeup will last longer, photograph beautifully, and make you feel confident throughout the celebration.

  • Brow to Lip: What to Expect from Your First Semi-Permanent Makeup Session

    Brow to Lip: What to Expect from Your First Semi-Permanent Makeup Session

    If you’re tired of spending precious minutes every morning perfecting your brows or reapplying lipstick throughout the day, semi-permanent makeup could be your new best friend. From brow shaping to lip blush, this beauty treatment offers a long-lasting solution for anyone who wants to wake up looking fresh, defined, and camera-ready.

    But if you’re new to the world of semi-permanent makeup, it’s completely normal to have questions like:

    • Does it hurt?
    • What’s the process like?
    • How long does it last?
    • What should I expect after the session?

    In this blog, we’ll walk you through everything you need to know about your first semi-permanent makeup appointment—from brows to lips.

    💡 What Is Semi-Permanent Makeup?

    Also known as micropigmentation or cosmetic tattooing, semi-permanent makeup involves implanting pigment into the upper layers of the skin using a machine or hand tool. It’s designed to subtly enhance your features, not replace makeup entirely. Common areas include:

    • Eyebrows – for shaping, fullness, and symmetry (microblading or powder brows)
    • Lips – for color, definition, and correction (lip blush tattoo)
    • Eyes – for subtle liner or lash enhancement

    The results typically last 1 to 3 years, depending on your skin type, lifestyle, and aftercare.

    🪞Before Your Appointment: How to Prepare

    Preparation is key to achieving the best results and a smooth healing process.

    ✅ Do:

    • Avoid caffeine and alcohol 24 hours before (they can thin your blood).
    • Discontinue use of retinol, glycolic acid, and exfoliants 7 days before the procedure.
    • Bring inspiration photos for your ideal brow or lip color/shape.
    • Eat before your appointment—sessions can last 2–3 hours.

    🚫 Don’t:

    • Don’t get a facial, waxing, or laser treatment a week before.
    • Avoid blood thinners (consult your doctor first).
    • Don’t wear heavy makeup on the area to be treated.

    💉 The Procedure: What Happens During the Session

    Here’s what a typical semi-permanent makeup appointment looks like:

    1. Consultation & Mapping

    The artist begins by assessing your natural features, understanding your preferences, and designing a shape that complements your face. For brows, this involves measuring, mapping, and outlining the perfect arch. For lips, the shape is carefully traced to enhance symmetry.

    2. Numbing

    A topical anesthetic is applied to minimize discomfort. Most clients report the sensation as a light scratching or pressure—very tolerable, especially with numbing cream.

    3. Pigment Application

    Using a sterile needle or blade, the technician implants pigment into the skin in tiny strokes or soft layers. This process can take 45 minutes to an hour depending on the area.

    • Brows: Microblading creates hair-like strokes, while powder brows give a shaded, soft look.
    • Lips: Lip blush gives your lips a tinted look, corrects uneven tone, and adds a fuller appearance.

    4. Final Touch-Up & Aftercare Instructions

    Once the initial application is complete, the artist will show you the results and give you detailed aftercare guidelines. You’ll also schedule your touch-up session, usually 4–6 weeks later.

    💬 After the Session: Healing & Expectations

    You’ll experience a healing process over the next 7–14 days. Here’s a breakdown:

    Days 1–3:

    The color will appear bold and intense—this is normal!

    Days 4–7:

    Mild scabbing or flaking may occur. Don’t pick at it—let it fall off naturally.

    Days 8–14:

    The pigment may look lighter or faded—this is also part of the process. Your skin is regenerating and the true color will gradually resurface.

    After 4–6 weeks:

    You’ll return for a touch-up session to perfect the shape and color, ensuring lasting results.

    🧴 Semi-Permanent Makeup Aftercare Tips

    • Keep the area clean and dry for the first few days.
    • Avoid direct sun exposure, swimming, or heavy sweating.
    • Use only the ointment or healing balm recommended by your artist.
    • Sleep on a clean pillowcase and avoid touching or rubbing the treated area.

    💄 Results to Expect

    When fully healed, you’ll enjoy:

    • Defined brows that don’t wash off
    • Soft, tinted lips with natural fullness
    • More symmetry in facial features
    • Less time spent on your makeup routine every day

    Results can last 12–36 months, and occasional touch-ups will keep everything looking fresh.

    💬 Final Thoughts: Is It Worth It?

    If you’re seeking a low-maintenance beauty solution that still lets you look polished and put-together, semi-permanent makeup is definitely worth considering. It’s especially ideal for:

    • People with busy schedules
    • Those with sparse brows or uneven lip color
    • Anyone looking for long-term convenience and confidence

    ✨ Are you ready for brow-to-lip transformation? Book an appointment with our certified artist today and wake up every day with effortlessly flawless features!

  • How to Look Younger with Home Remedies: Natural Anti-Aging Secrets

    How to Look Younger with Home Remedies: Natural Anti-Aging Secrets

    In today’s fast-paced world, maintaining a youthful appearance is a priority for many, especially working professionals who want to look confident and fresh. While there are countless anti-aging products and cosmetic treatments available, home remedies offer a natural, cost-effective, and chemical-free alternative.

    This guide explores everything you need to know about looking younger with home remedies. From understanding why your skin ages to discovering simple, effective remedies, this comprehensive guide has you covered. For those seeking professional guidance, book an appointment today to enhance your skincare routine.

    1. Understanding the Aging Process

    Why Does Skin Age?

    Aging is a natural process influenced by:

    • Collagen Depletion: As we age, collagen production decreases, leading to loss of skin elasticity.
    • Environmental Factors: Sun exposure, pollution, and harsh weather can accelerate skin aging.
    • Lifestyle Choices: Stress, poor diet, and lack of sleep also contribute to premature aging.

    Signs of Aging

    Common signs of aging include:

    • Wrinkles and fine lines.
    • Age spots and uneven skin tone.
    • Sagging skin, especially around the eyes and jawline.

    Understanding these factors is crucial to selecting the right home remedies for your skin type.

    2. Benefits of Home Remedies for Anti-Aging

    Why choose home remedies?

    • Cost-Effective: Most remedies use ingredients you already have at home.
    • Natural and Gentle: Avoid harmful chemicals that can irritate your skin.
    • Environmentally Friendly: Reduce waste from packaging and production.

    Home remedies allow you to nourish your skin naturally while saving time and money.

    3. Top Home Remedies to Look Younger

    A. Hydrating Remedies for Skin Elasticity

    Aloe Vera Gel: Apply fresh Aloe Vera gel directly to your skin to hydrate and soothe. It’s packed with antioxidants and vitamins that promote skin elasticity.

    Cucumber and Honey Mask: Blend cucumber with honey and apply as a mask for 15 minutes. This remedy hydrates the skin and reduces puffiness.

    B. Remedies for Wrinkles and Fine Lines

    Egg White Mask: Beat an egg white until frothy and apply it to your face. Let it dry before rinsing off. Egg whites tighten the skin and reduce the appearance of fine lines.

    Olive Oil Massage: Warm a few drops of olive oil and gently massage your face in circular motions. Olive oil is rich in antioxidants and deeply hydrates the skin.

    C. Remedies for a Radiant Glow

    Turmeric and Yogurt Mask: Mix a teaspoon of turmeric with two tablespoons of yogurt. Apply the mixture to your face for 10-15 minutes before rinsing. Turmeric brightens the skin, while yogurt exfoliates gently.

    Lemon and Sugar Scrub: Combine sugar with a few drops of lemon juice to create a natural exfoliant. Gently scrub your face to remove dead skin cells and reveal a fresh glow.

    D. Remedies to Reduce Puffy Eyes and Dark Circles

    Green Tea Bag Compress: Place cooled green tea bags over your eyes for 10 minutes. The antioxidants in green tea reduce inflammation and soothe tired eyes.

    Potato Slices: Slice a raw potato and place the slices over your eyes. Potatoes contain enzymes that help lighten dark circles.

    4. Lifestyle Tips to Enhance the Effects of Home Remedies

    Hydration

    Drink at least 8 glasses of water daily to keep your skin hydrated and flush out toxins.

    Healthy Diet

    Consume foods rich in antioxidants, vitamins, and omega-3 fatty acids, such as:

    • Leafy greens.
    • Nuts and seeds.
    • Fatty fish like salmon.

    Regular Exercise

    Exercise improves blood circulation, delivering oxygen and nutrients to your skin, promoting collagen production.

    Sleep

    Aim for 7-8 hours of quality sleep each night to allow your skin to regenerate and repair itself.

    Sun Protection

    Use natural sunscreens like coconut oil and wear hats or sunglasses when outdoors to protect your skin from UV damage.

    5. Common Mistakes to Avoid with Home Remedies

    Over-Exfoliating

    Using scrubs too frequently can damage your skin barrier and cause irritation. Stick to exfoliating 1-2 times a week.

    Ignoring Allergies

    Always patch-test new ingredients to avoid allergic reactions or sensitivities.

    Skipping Sun Protection

    Some ingredients like lemon or turmeric can make your skin sensitive to sunlight. Always follow up with sunscreen after using these remedies.

    6. When to Consult a Professional

    Home remedies can work wonders, but for stubborn skin concerns or advanced anti-aging solutions, professional advice is invaluable.

    • Persistent wrinkles, dark spots, or uneven skin tone may require specialized treatments.
    • If you experience skin irritation or reactions to any remedies, consult a dermatologist immediately.

    Looking for tailored skincare advice? Book an appointment today with a professional to design the perfect anti-aging routine for your busy lifestyle.

    Conclusion

    Home remedies are a simple, natural way to combat the signs of aging and maintain youthful, glowing skin. From hydrating masks to lifestyle adjustments, these tips can help you achieve noticeable results without breaking the bank.

    For those who want a personalized approach, consult a skincare expert. Book an appointment today to explore professional treatments and recommendations that complement your natural remedies.

  • Cooling Beauty Tips at Home: Hacks to Keep Your Skin Cool and Hydrated

    Cooling Beauty Tips at Home: Hacks to Keep Your Skin Cool and Hydrated

    When the temperatures rise, your skin often bears the brunt of the heat—leaving it feeling sticky, sweaty, dehydrated, and prone to breakouts. Whether you’re a working professional, a mom managing a household, or simply trying to beat the heat in your beauty routine, staying cool and refreshed is key to maintaining healthy, glowing skin.

    Here are easy, effective, and natural cooling beauty tips you can try at home to keep your skin cool, calm, and beautifully hydrated.

    🧊 1. Start Your Day With a Cooling Cleanser

    Swap your usual creamy cleanser for a gel-based or foam cleanser that feels light and refreshing on the skin. Look for ingredients like:

    • Cucumber
    • Aloe vera
    • Tea tree oil
    • Mint

    💡 DIY Tip:
    Mix a few drops of peppermint oil or fresh aloe vera gel into your cleanser for an added cooling effect. Store it in the fridge overnight and enjoy a chilled cleanse in the morning!

    🥒 2. Cucumber Ice Cubes for Instant Relief

    Cucumber is rich in antioxidants and has a naturally cooling effect on the skin.

    How to Make:

    • Blend 1 cucumber with a tablespoon of aloe vera gel.
    • Pour into an ice cube tray and freeze.
    • Rub a cube gently on your face after cleansing to reduce puffiness, calm redness, and hydrate.

    Bonus: Also great for tired eyes and sun-exposed skin!

    💦 3. Hydrating Face Mists Are a Game-Changer

    A face mist can work wonders for your skin when you’re out in the sun or in front of a laptop all day. Keep a small spray bottle in your bag or at your desk.

    DIY Hydrating Face Mist:

    • ½ cup rose water
    • 1 tablespoon aloe vera gel
    • Few drops of lavender or chamomile essential oil
    • Store in the fridge for extra chill

    Mist your face 2–3 times a day to keep your skin dewy, calm, and fresh.

    🍉 4. Use Seasonal Fruits for Face Packs

    Spring and summer fruits like watermelon, papaya, and strawberries not only taste delicious but also deliver hydration and nourishment to your skin.

    DIY Watermelon & Honey Cooling Mask:

    • 2 tablespoons watermelon juice
    • 1 tablespoon honey
    • Apply for 10–15 minutes and rinse off with cool water.

    🍉 Watermelon hydrates and soothes, while honey locks in moisture.

    🧴 5. Aloe Vera is Your Summer Skincare Bestie

    Aloe vera has a natural cooling and healing effect on sun-damaged or overheated skin.

    • Apply fresh aloe vera gel after washing your face or before bedtime as a sleeping mask.
    • Use as an after-sun treatment or to calm razor bumps and heat rashes.

    💚 Pro Tip: Keep your aloe gel in the fridge for an extra-refreshing boost.

    🌬️ 6. Chilled Green Tea for Soothing Skin

    Green tea is rich in antioxidants and anti-inflammatory properties. It’s perfect for irritated or acne-prone skin.

    DIY Cooling Toner:

    • Brew green tea, cool it, and pour into a spray bottle.
    • Use it as a toner or face mist.

    You can also freeze it into ice cubes and rub on your face to calm puffiness or tighten pores.

    🧖‍♀️ 7. Weekly Cooling Masks

    Treat your skin to a cooling face mask at least once a week to maintain hydration and control oil.

    DIY Cooling Oatmeal Mask:

    • 2 tbsp oatmeal (soaked and softened)
    • 1 tbsp yogurt
    • 1 tbsp cucumber juice

    Apply the mask, leave it on for 15 minutes, and rinse off with cool water. This is great for soothing irritated skin and adding a splash of moisture.

    💧 8. Hydrate From Within

    Glowing skin starts from the inside. Make sure to drink at least 8-10 glasses of water daily and include hydrating foods like:

    • Watermelon
    • Oranges
    • Coconut water
    • Leafy greens
    • Cucumber
    • Mint

    🧃 Herbal teas like mint, chamomile, or hibiscus also help keep your system cool.

    🛌 9. Sleep with Cooling Skincare

    Use a light gel-based moisturizer before bed that helps calm your skin and allows it to breathe. Look for ingredients like:

    • Hyaluronic acid
    • Cucumber
    • Green tea
    • Vitamin E

    💤 Sleep on a cotton or silk pillowcase, and if the weather is extra warm, place a chilled washcloth on your pillow before sleeping.

    ☀️ 10. Don’t Skip Sunscreen – Use a Cooling Formula

    Even if you’re staying indoors, sun rays from windows can harm your skin. Use a broad-spectrum, non-greasy, cooling sunscreen with SPF 30 or higher.

    Choose water- or gel-based sunscreens with added ingredients like cucumber, aloe vera, or vitamin C for extra protection and hydration.

    🔚 Conclusion: Stay Cool, Stay Glowing

    Keeping your skin cool and hydrated at home doesn’t require fancy products or spa appointments. With a few easy tweaks to your routine and some natural ingredients from your kitchen, you can beat the heat while maintaining a radiant, healthy glow.

    For those constantly battling redness, sensitivity, or dullness in the summer, consider consulting a skincare expert. You may benefit from professional cooling facials, hydrating skin treatments, or even semi-permanent makeup services that stay put—no matter how hot the day gets.

    👉 Ready to refresh your beauty routine this summer? Contact your local skin therapist or beauty expert for personalized recommendations.

  • Kalaveras – A Flavorful Fiesta Followed by Relaxation at Essence Beauty Spa in Redondo Beach

    If you’re looking for a fun, flavorful, and unique dining experience in Redondo Beach, Kalaveras should be at the top of your list. Located at 228 Avenue I, Redondo Beach, CA 90277, Kalaveras is not just a restaurant—it’s a celebration of culture, music, and bold Mexican flavors. After enjoying your delicious meal, make your day even better with a relaxing beauty treatment at Essence Beauty Spa, just a short drive away.

    A Vibrant Mexican Dining Experience at Kalaveras

    Kalaveras offers more than just food—it brings you into a lively, colorful atmosphere inspired by Dia de Los Muertos (Day of the Dead). The walls are filled with vibrant artwork, the music is upbeat, and the food? Absolutely unforgettable.

    Whether you’re visiting with friends, on a date, or celebrating something special, Kalaveras creates the perfect backdrop. Their menu is full of mouthwatering options—from street tacos and birria ramen to loaded nachos and sizzling fajitas. Pair your meal with one of their handcrafted margaritas or fruity micheladas for the full experience.

    The restaurant blends traditional Mexican flavors with modern twists, giving you something new to try each time you visit. Plus, with its beachside location, Kalaveras gives you that perfect SoCal vibe.

    Refresh Your Look at Essence Beauty Spa

    Once you’ve had your fill of food and fun at Kalaveras, why not take some time to pamper yourself? Just a few minutes away at 1740 Aviation Blvd A, Redondo Beach, CA 90278, Essence Beauty Spa is your local destination for all things beauty and skincare.

    Essence Beauty Spa offers a full range of personalized beauty treatments in a peaceful, clean, and professional setting. Their experienced team makes sure every guest feels welcomed and taken care of. Services include:

    • Eyelash Extensions – for bold, beautiful lashes without mascara
    • Facials – customized treatments to cleanse, hydrate, and brighten your skin
    • Microneedling – a rejuvenating service that helps with scars, fine lines, and skin texture
    • Waxing – for smooth, hair-free skin in all the right places
    • Semi-Permanent Makeup – wake up looking polished with enhanced brows or lips

    Whether you’re preparing for a night out, a beach day, or just want to treat yourself, Essence Beauty Spa is the perfect stop. You can book online at essencebeauty-spa.com to schedule your session.

    A Perfect Redondo Beach Pairing

    From flavorful Mexican dishes and cocktails at Kalaveras to skin and beauty treatments at Essence Beauty Spa, this duo offers the perfect combination of fun and relaxation. It’s an ideal way to enjoy your day in Redondo Beach—whether you’re a local looking for something new or a visitor exploring the South Bay.

    So, why not plan your next outing to include both? Start with a vibrant meal, then unwind and take care of yourself. Great food. Great vibes. And a glow-up to finish the day—Redondo Beach has it all.

  • Top Anti-Aging Foods for Healthy Skin and Overall Wellness

    Top Anti-Aging Foods for Healthy Skin and Overall Wellness

    Eating the right foods can help you stay healthy and keep your skin glowing, especially as you age. Many foods are packed with nutrients that fight wrinkles, keep your skin hydrated, and make you feel energized. While eating well is essential, combining it with professional skincare treatments like facials can enhance the results. If you’re looking for expert help to maintain youthful skin, book an appointment for an anti-aging facial or consultation today!

    Here are some of the best anti-aging foods that are easy to find and add to your diet:


    1. Avocados

    Avocados are rich in healthy fats that keep your skin soft and moisturized. They also contain vitamin E, which protects your skin from damage caused by the sun and pollution.

    Tip: Add avocado slices to your salads, or spread it on toast for a quick snack.


    2. Berries (Blueberries, Strawberries, etc.)

    Berries are full of antioxidants, which fight free radicals that can damage your skin cells and cause wrinkles. They are also high in vitamin C, which helps your skin stay firm and bright.

    Tip: Enjoy a handful of berries as a snack or mix them into your morning yogurt.


    3. Fatty Fish (Salmon, Mackerel, etc.)

    Fatty fish like salmon are packed with omega-3 fatty acids, which reduce inflammation and keep your skin hydrated. They also contain protein, essential for repairing and maintaining healthy skin.

    Tip: Grill or bake salmon for dinner, and pair it with a side of vegetables for a balanced meal.


    4. Nuts and Seeds (Almonds, Walnuts, Chia Seeds)

    Nuts and seeds are rich in vitamins E and B, which protect your skin from aging. Walnuts also contain omega-3 fatty acids, while chia seeds are a great source of hydration.

    Tip: Sprinkle chia seeds over your oatmeal or carry a small bag of almonds as a healthy snack.


    5. Leafy Greens (Spinach, Kale, etc.)

    Leafy greens are loaded with vitamins A and C, which boost collagen production and keep your skin firm. They also help detox your body, which is important for glowing skin.

    Tip: Add spinach or kale to your smoothies, or make a refreshing salad with olive oil and lemon.


    6. Sweet Potatoes

    Sweet potatoes are high in beta-carotene, which converts to vitamin A in your body. This vitamin helps repair skin and keep it smooth.

    Tip: Roast sweet potato slices as a healthy alternative to fries, or add them to soups.


    7. Tomatoes

    Tomatoes are a great source of lycopene, which protects your skin from sun damage and keeps it looking young. They also contain vitamin C for added skin benefits.

    Tip: Use fresh tomatoes in your salads, or enjoy them as part of a hearty soup or pasta sauce.


    8. Green Tea

    Green tea is packed with antioxidants that help reduce inflammation and prevent wrinkles. It also keeps your skin hydrated and glowing.

    Tip: Replace sugary drinks with a warm cup of green tea, or make a refreshing iced green tea with lemon.


    9. Dark Chocolate (70% Cocoa or More)

    Dark chocolate contains flavonoids, which protect your skin from sun damage and improve its texture. It’s a guilt-free treat that benefits your skin too!

    Tip: Eat a small piece of dark chocolate after meals to satisfy your sweet tooth.


    10. Water

    Staying hydrated is one of the simplest ways to keep your skin looking fresh and healthy. Water flushes out toxins and helps maintain elasticity in your skin.

    Tip: Aim to drink 8 glasses of water a day. Add lemon or cucumber slices for a refreshing twist.


    Enhance Your Glow with Professional Treatments

    While these anti-aging foods work wonders, you can amplify their effects with professional skincare treatments. An anti-aging facial, skin hydration therapy, or personalized consultation can address specific concerns and keep your skin radiant.

    Ready to Take the Next Step?
    Book an appointment today for a facial or skincare consultation and discover how we can help you achieve youthful, glowing skin!

  • How to Maintain Your Bro Lamination: Tips for Long-Lasting Results

    Bro Lamination is an innovative grooming technique that has taken the beauty world by storm, offering men the opportunity to achieve fuller, thicker, and more sculpted brows. The procedure involves setting the brow hairs in place using a specialized solution, giving them a sleek, polished look. However, to ensure long-lasting results and maintain that sharp, well-groomed appearance, it’s essential to follow proper aftercare.

    In this guide, we’ll walk you through the top tips for maintaining your Bro Lamination and ensuring that your brows stay fresh and perfect for as long as possible.

    What is Bro Lamination?

    Bro Lamination is a technique that helps achieve smooth, uniform, and fuller-looking brows by setting the hairs in place with a gentle chemical solution. This process is designed to help you tame unruly brows, correct asymmetry, and create a more defined look. Whether you have thin or thick brows, Bro Lamination can be customized to suit your individual style, giving you a more structured and polished appearance that lasts for weeks.

    Why Maintenance is Key

    To keep your brows looking sharp and flawless, maintenance is key. Bro Lamination involves setting the hairs in a specific direction, but improper aftercare can lead to the treatment fading quicker or the shape being altered. By following a few simple steps, you can extend the life of your Bro Lamination and continue to enjoy your well-groomed brows for longer periods.

    Top Tips for Maintaining Your Bro Lamination

    1. Avoid Water for 24 Hours Post Treatment After getting your Bro Lamination done, it’s essential to avoid water on your brows for the first 24 hours. Water can interfere with the setting process, causing the brow hairs to lose their shape. To ensure the best results, allow the lamination solution to fully bond with the brow hairs before exposing them to moisture.
    2. Use a Brow Brush Daily Brushing your brows daily is crucial to maintaining their shape and direction. A good brow brush will help to keep the hairs in place and prevent them from looking messy. Make sure to brush gently, starting from the center of the brows and working outward. This will keep your brows looking fresh and defined throughout the day.
    3. Avoid Harsh Chemicals It’s important to avoid using any products that contain alcohol, as they can dry out and damage your laminated brows. Harsh chemicals can also weaken the lamination, causing the shape to wear off faster. Stick to mild, alcohol-free cleansers and moisturizers to preserve the treatment.
    4. Keep Your Brows Hydrated Just like your skin and hair, your brows need hydration to stay healthy. Dry brows can make the lamination look flaky or brittle. Using nourishing oils or brow serums can help keep your brows hydrated and maintain the sleek, glossy look. Look for products specifically designed for brow care that provide gentle moisture.
    5. Sleep on Your Back If you tend to sleep on your stomach or side, you may unknowingly be putting pressure on your brows, which can affect their shape. To keep your brows looking fresh, try to sleep on your back for the first few nights after the procedure. This will prevent any distortion to your newly laminated brows.
    6. Book Regular Touch-Ups Bro Lamination typically lasts 6-8 weeks, depending on your hair growth cycle and how well you maintain your brows. To keep them looking as perfect as possible, it’s important to schedule regular touch-ups. Touching up your brows every few weeks ensures that they remain in great shape and continue to complement your facial features.

    Common Mistakes to Avoid After Bro Lamination

    • Over-washing brows: Excessive washing or scrubbing of your brows can remove the lamination and cause the brows to lose their shape.
    • Applying makeup: Avoid using makeup on your brows, especially within the first 24 hours of getting Bro Lamination, as it can interfere with the results.
    • Using oil-based products: Oil-based skincare products can break down the lamination solution, leading to premature fading of the treatment.

    Final Words:

    Maintaining your Bro Lamination is simple when you follow the right steps. By avoiding water for the first 24 hours, brushing your brows daily, keeping them hydrated, and scheduling regular touch-ups, you can enjoy long-lasting results. If you want to keep your brows looking their best, be sure to book an appointment with a professional for regular touch-ups and to ensure the health and shape of your brows.

  • The Benefits of Microneedling: Why It’s a Must-Try for Skin Rejuvenation

    The Benefits of Microneedling: Why It’s a Must-Try for Skin Rejuvenation

    Microneedling, also known as collagen induction therapy, is a minimally invasive cosmetic procedure that involves the use of fine needles to create micro-injuries in the skin. This process stimulates the body’s natural wound healing response, leading to the production of collagen and elastin, which are essential for maintaining youthful, healthy skin.

    Below are some of the key benefits of microneedling that make it a popular choice for skin rejuvenation.

    1. Improves Skin Texture and Tone

    Microneedling is particularly effective in improving the overall texture and tone of the skin. The treatment helps reduce the appearance of fine lines, wrinkles, and enlarged pores, resulting in a smoother complexion. The collagen produced during the healing process fills in fine lines and scars, giving the skin a plumper and more youthful appearancees Scars and Stretch Marks**

    One of the most significant benefits of microneedling is its ability to diminish the appearance of scars, including acne scars and stretch marks. The micro-injuries created during the procedure trigger a natural healing process, which leads to the remodeling of scar tissue. Many patients notice a considerable improvement in the texture and visibility of scars after a series of treatments .

    3. Enhtion

    Microneedling can significantly enhance the absorption of topical skincare products. The tiny channels created by the needles allow for better penetration of serums, moisturizers, and other treatments, making them more effective. This means that patients can maximize the benefits of their skincare routines by using targeted products immediately after their microneedling session .

    4. **Safe for All Skin Typser treatments, microneedling is safe for all skin types and tones. It has a low risk of pigmentation changes, making it an excellent option for individuals with darker skin tones, who may be more susceptible to hyperpigmentation from other treatments .

    5. Minimal Downtime

    One of the advantagis the minimal downtime required after the procedure. While some redness and swelling can occur, similar to a mild sunburn, most patients can return to their normal activities within a day or two. This makes it a convenient option for those seeking skin rejuvenation without lengthy recovery times .

    6. Stimulates Hair Growth

    Microneedling isn’t limited to t can also be used on the scalp to stimulate hair growth. The micro-injuries encourage blood flow to the hair follicles and can improve the effectiveness of hair growth products, making it a popular choice for individuals dealing with thinning hair or alopecia .

    Conclusion:

    Microneedling offers a multitude of benefits that make it an attract looking to rejuvenate their skin. From improving texture and tone to reducing scars and enhancing product absorption, this treatment can help achieve a more youthful appearance with minimal downtime. If you’re considering microneedling, consult with a licensed professional to discuss your specific skin concerns and goals.

    For further reading, you can explore resources such as the American Academy of Dermatology here and Healthline’s detailed guide on microneedling here.


    References

    1. American Academy of Dermatology. (n.d.). “Microneedling: What to Expect.”
    2. Healthline. (n.d.). “What Is Microneedling? Benefits and Risks.”
    3. Dermstore. (n.d.). “Microneedling: Benefits, Cost, and More.”
    4. Verywell Health. (n.d.). “Microneedling: An Overview.”
  • At-Home Microneedling vs. Professional Microneedling: What You Need to Know

    At-Home Microneedling vs. Professional Microneedling: What You Need to Know

    Microneedling has gained immense popularity in recent years as an effective treatment for skin rejuvenation, acne scars, wrinkles, and even hair loss. The procedure uses tiny needles to create micro-injuries in the skin, stimulating collagen and elastin production, which promotes healing and a youthful appearance. With the rise of at-home microneedling devices, many are wondering whether they should stick with professional treatments or try DIY microneedling at home.

    In this blog, we’ll explore the key differences between at-home microneedling and professional microneedling, the benefits and risks of each, and what you need to know before choosing the best option for your skincare routine.


    What is Microneedling?

    Microneedling, also known as collagen induction therapy (CIT), is a minimally invasive treatment designed to improve the appearance of the skin by triggering its natural healing process. This is achieved by rolling or stamping tiny needles into the skin to create controlled micro-injuries. These small punctures stimulate collagen and elastin production, which helps in healing scars, reducing fine lines, improving skin texture, and promoting a radiant glow.

    While the basic principle remains the same, there are significant differences between professional microneedling treatments and at-home devices.


    Professional Microneedling: Why It’s More Effective

    Professional microneedling is performed by licensed dermatologists, estheticians, or cosmetic surgeons who have extensive training and use high-grade, FDA-approved microneedling devices. Here’s why professional microneedling is often more effective:

    1. Depth of Needle Penetration

    • Professional Microneedling: The needles used in professional treatments are longer, usually between 0.5 mm to 3 mm in depth. This allows them to penetrate deeper layers of the skin, which leads to more significant collagen production and better results, especially for issues like deep acne scars and wrinkles.
    • At-Home Microneedling: Most at-home devices are designed with shorter needles, typically no longer than 0.5 mm. This means they can only penetrate the surface layers of the skin (the epidermis), which limits their effectiveness in addressing deeper skin concerns.

    2. Customization and Expertise

    • Professional Microneedling: Licensed professionals can customize the treatment based on your specific skin type, concerns, and goals. They are trained to adjust the depth of the needles, the pressure applied, and the frequency of the treatments for optimal results. Additionally, professional treatments often combine microneedling with other therapies like PRP (Platelet-Rich Plasma) or serums for enhanced results.
    • At-Home Microneedling: At-home devices are not customizable. They are generally one-size-fits-all, which means you may not get the targeted treatment your skin needs. Moreover, without the expertise of a professional, there’s a higher risk of incorrect application, which could lead to poor results or even skin damage.

    3. Use of Professional-Grade Devices

    • Professional Microneedling: Clinics and spas use high-quality, FDA-cleared devices with advanced technology that ensures the needles are sharp, precise, and sterile. This minimizes the risk of infection and ensures maximum effectiveness.
    • At-Home Microneedling: At-home rollers and devices are often lower quality, with needles that can become dull or uneven with repeated use. Dull needles can tear the skin rather than creating clean punctures, leading to irritation, infection, or poor results.

    4. Safety and Sterilization

    • Professional Microneedling: Licensed professionals adhere to strict hygiene and safety protocols, using sterile tools and ensuring a clean environment. This drastically reduces the risk of infection and complications.
    • At-Home Microneedling: Maintaining proper sanitation at home can be challenging. If the microneedling device isn’t thoroughly cleaned after each use, bacteria can accumulate, which increases the risk of infections and breakouts.

    5. Results and Effectiveness

    • Professional Microneedling: Because professionals can reach deeper layers of the skin, the results are often more noticeable and long-lasting. Professional treatments are ideal for addressing deep wrinkles, severe acne scars, stretch marks, and more.
    • At-Home Microneedling: At-home devices are more suitable for maintaining skin health, improving surface-level texture, and enhancing the absorption of skincare products. However, they are not as effective for deeper issues like significant scarring or wrinkles.

    At-Home Microneedling: Convenience with Caution

    While professional microneedling offers numerous advantages, at-home microneedling has its place, particularly for those looking for more affordable and convenient options. However, it’s important to be aware of the limitations and risks.

    1. Suitable for Surface-Level Issues

    • What It’s Good For: At-home microneedling is best suited for improving the skin’s texture, minor hyperpigmentation, and enhancing product absorption. When done correctly and with a high-quality device, it can also help improve skin tone and overall radiance.
    • Limitations: At-home microneedling is not ideal for treating deep scars, severe acne, or pronounced signs of aging. The shorter needle length means it cannot penetrate deeply enough to significantly boost collagen production in the dermis.

    2. Frequency of Use

    • At-Home Frequency: Due to the shorter needle length, at-home microneedling can be done more frequently than professional treatments. However, it’s essential not to overdo it, as too-frequent use can cause irritation, inflammation, and skin damage.
    • Professional Treatments: Professional microneedling sessions are typically spaced 4-6 weeks apart, allowing the skin enough time to heal and regenerate between sessions.

    3. Potential Risks

    • At-Home Risks: Without proper knowledge or technique, at-home microneedling can lead to infections, skin irritation, hyperpigmentation, or damage, particularly if the device isn’t sanitized properly or if the needles are dull.
    • Safety Precautions: Always follow instructions carefully, ensure your device is sterile, and avoid sensitive areas like the eye area.

    Choosing Between At-Home and Professional Microneedling

    So, which option is right for you? It depends on your skincare goals and concerns.

    • Opt for Professional Microneedling if:
      • You’re looking to treat deep acne scars, wrinkles, or stretch marks.
      • You want customized treatments that address specific skin concerns.
      • You prefer a safer, more controlled environment with expert oversight.
    • Consider At-Home Microneedling if:
      • You’re looking for a more affordable and convenient way to maintain your skin.
      • You’re targeting surface-level concerns like texture or minor pigmentation.
      • You’re already familiar with proper microneedling techniques and aftercare.

    Final Thoughts

    Both at-home and professional microneedling have their benefits, but it’s important to weigh the risks and rewards before deciding. While at-home devices are more convenient and affordable, professional treatments deliver more significant and longer-lasting results, especially for more serious skin concerns.

    If you’re unsure, it’s always a good idea to consult with a skincare professional who can guide you on the best treatment for your skin type and goals.

    Looking for professional microneedling services in Redondo Beach? Contact Essence Beauty Spa. Our experienced team provides expert microneedling treatments tailored to your unique skin needs, helping you achieve glowing, youthful skin safely and effectively.

Design a site like this with WordPress.com
Get started